The middle of winter can be the least-beautiful time to photograph portraits. Just like my studio closes outdoor family portrait sessions in the winter, the murky backgrounds, flat light and leafless trees don’t provide the richest of backgrounds.
But that can be saved, thanks to your aperture setting on your dslr!
In this blog post for photographers and hobbyists alike, I’m sharing a few tips to help you give your portraits some dreamy bokeh and colorful pop in the dead of winter.

Find a Pop of Color
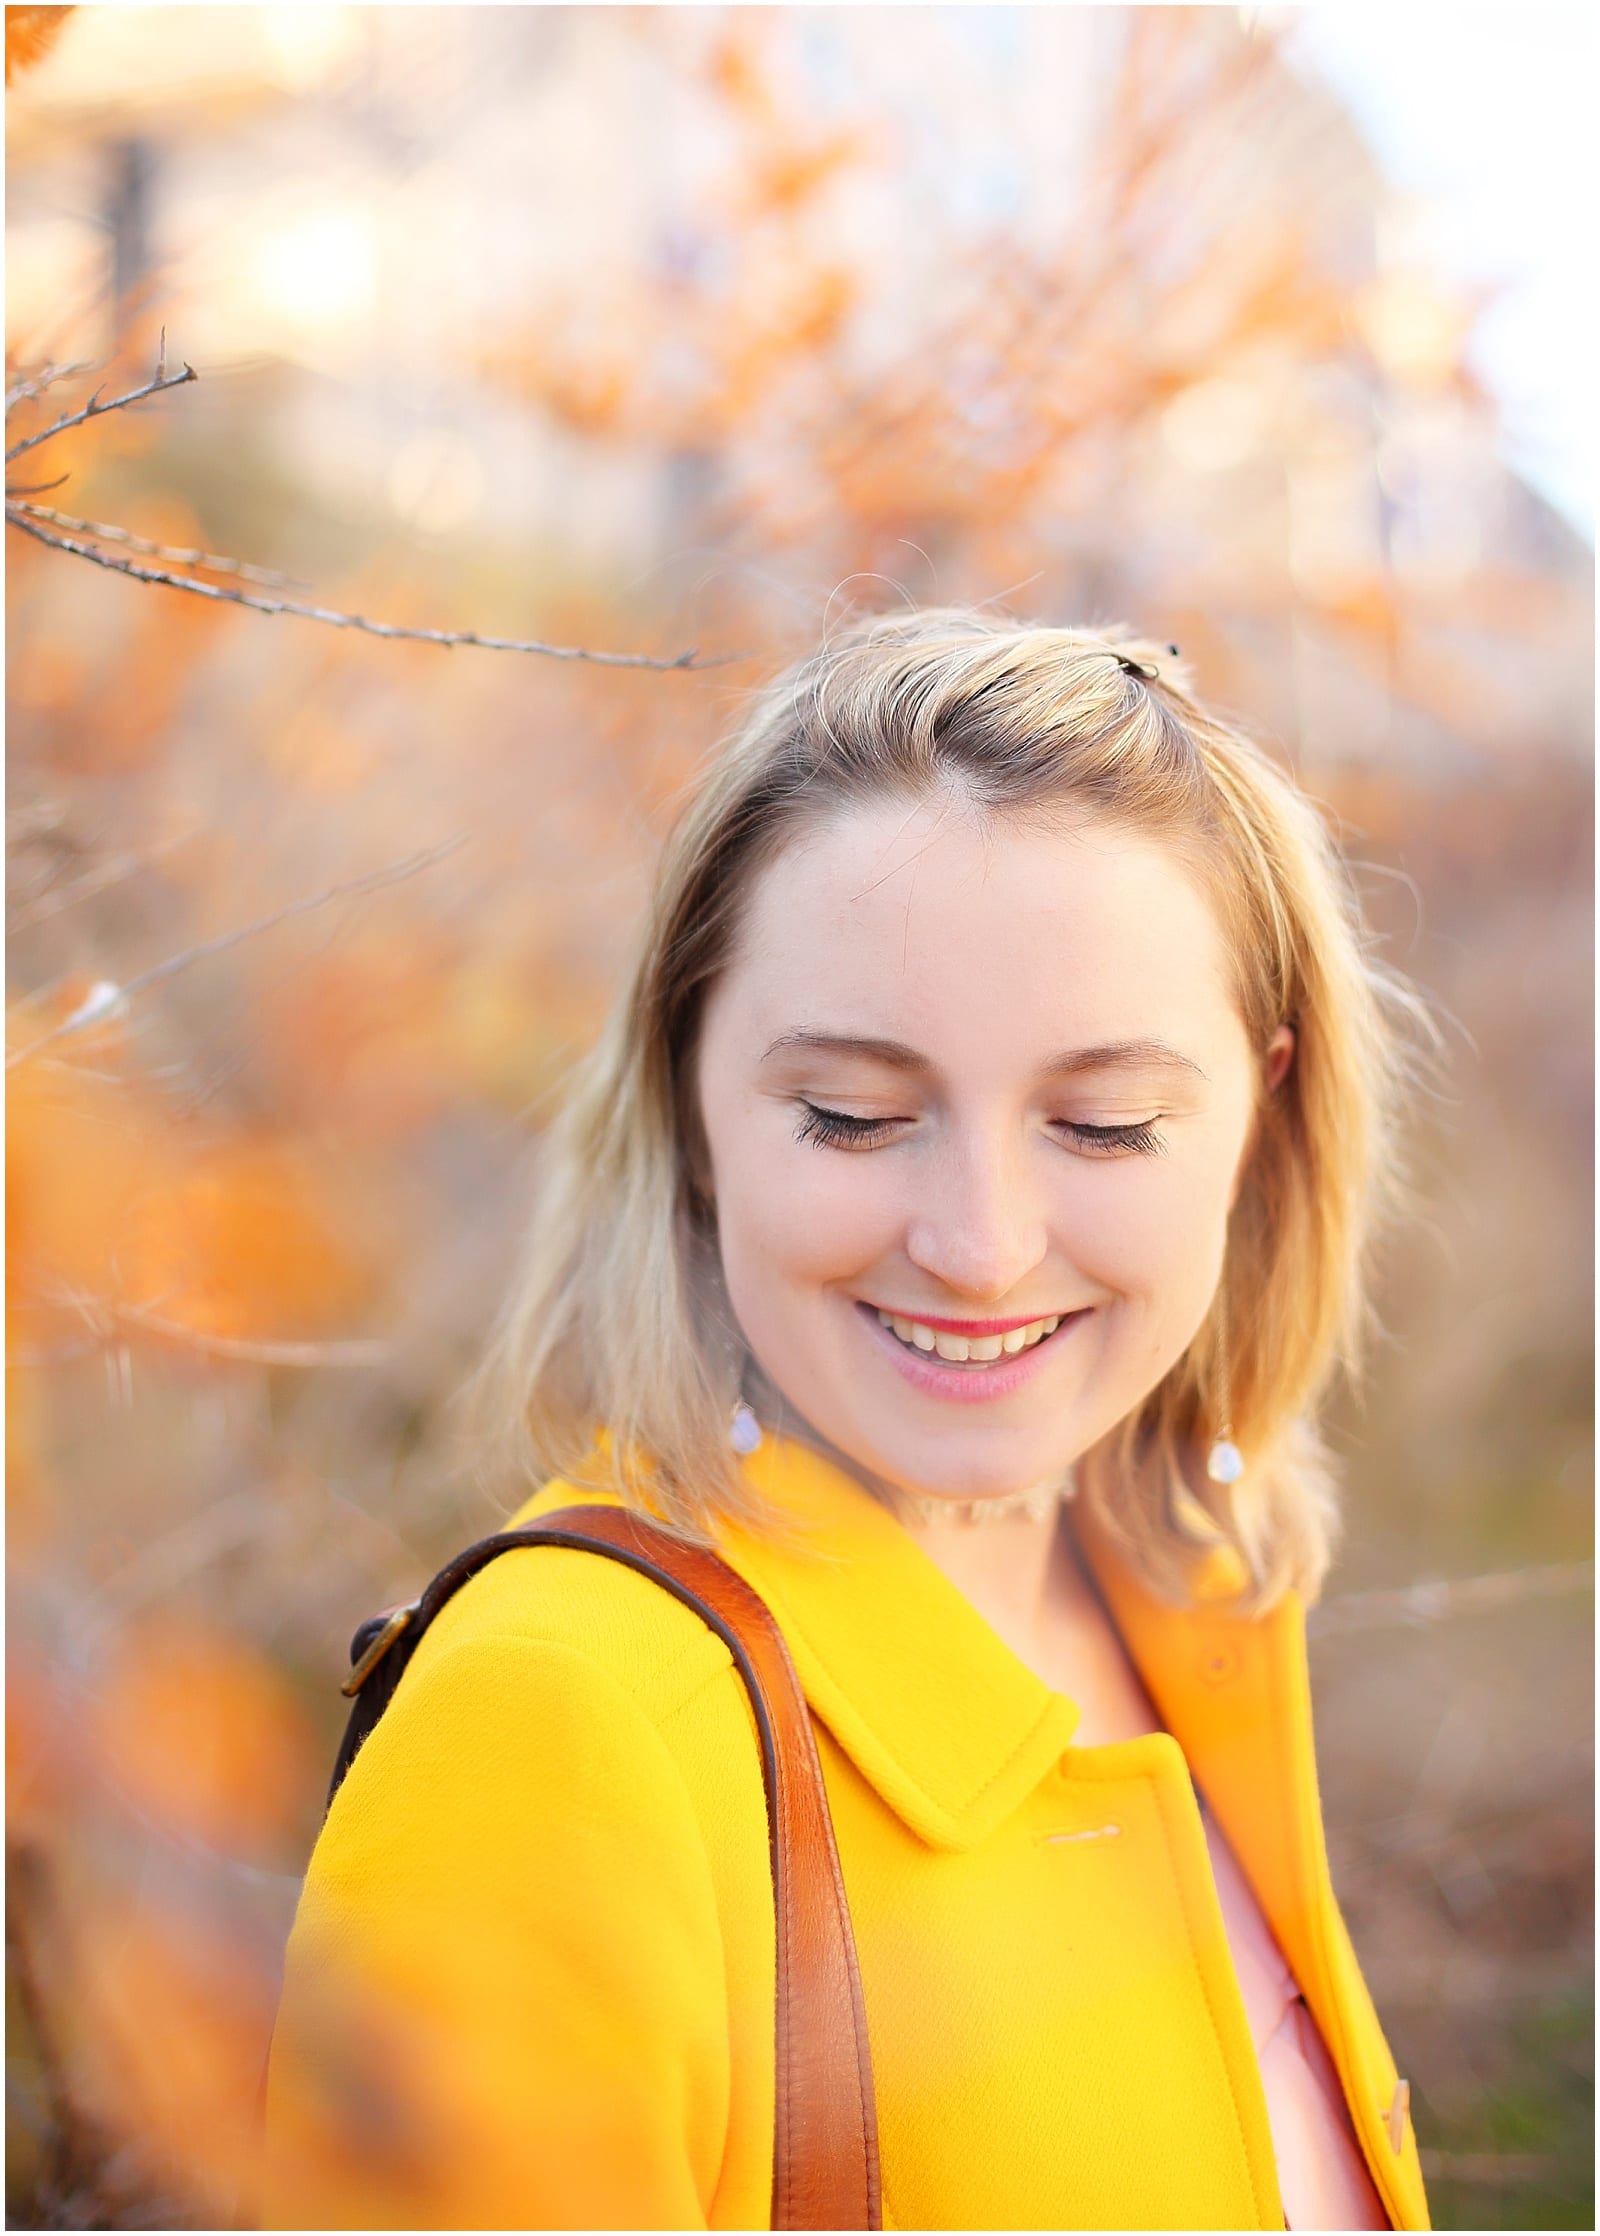
The first task – find some color! No matter if you live in a small snow-filled town in Connecticut or the dreary, flat-lit hills of Scotland, there is bound to be a tiny bit of saturated color somewhere. Look along the water, grasses, golden fields or a colorful building in town. For my portrait example, I found this small bit of shrubbery along the water in my town of Strasbourg, France. While wandering the canals, I found a shrub with scattered, brightly-colored oranges berries. Upon seeing this hint of color, I knew I could make my deary setting look like a Fall day in New England!

Place Subject in Between Foreground and Background Color
To really draw your viewers eyes to the portrait, you’ll want to add some foreground and background in between your model’s face. This gives an image a little extra pop and helps focus the attention on a particular subject you want your viewer to focus on.
In my situation, I assessed what I wanted my ideal portrait to look like visually before taking action and decided that I wanted a mix of orange berries to be in the background blur as well as in front of me, so as to frame my husband’s face. I moved my husband, who was walking along the canal with me at the time, beside the shrub and delicately lowered a berry-filled branch (so as to not get pricked by the sharp needles on the plant!) underneath his face, to frame the portrait. I also always look for the catchlights – or the little light dots from the sun – reflecting in the subject’s eyes.

The shrub I used to photograph
Adjust Your Aperture
The final step to get that gorgeous milky and dreamy bokeh around your subject is to open up your aperture. In other words, you want to lower your /f. stop as low as it can go without getting your subject’s entire face in focus.
This lower aperture setting results in a narrower depth of field, so you are able to select specific objects to focus in on within the frame and leave the rest out of focus and blurry. For my style personally, the more background blur, the better when photographing portraits. I just love the simplicity and dreamy-ness of it all.
While I often love lowering my aperture to 1.8 or even 1.6, in this situation my aperture was at an f stop of 2.0 on my Canon 50mm 1.4 lens. Since the lower aperture is allowing more light into my camera, I can use a faster shutter speed, which can result in sharper, more clear photographs.
If you’d like to see what my gears consists of for my family portrait sessions, click here!
My Camera Settings
For these images, my settings on my 50 mm were: ISO 400, f/2.0 and 1/600 second.
I personally love a low aperture, a super high shutter speed and then adjust my ISO last. A little bit of grain never bothers me, as my heavy-duty dslr can take it, and I also use Noiseware in Photoshop in post-processing if worst comes to worst there is more grain than I’d like.
Boost Up that Saturation in Photoshop or Lightroom
Last but not least, I use Photoshop to edit my images. For these portraits, that my husband so graciously took of me in my new and most beloved Poshmark-bought J. Crew coat (which I have been dreaming of owning for two years!) I boosted up that orange saturation and increased the contrast! In order to have only the orange shrubs be vibrant and saturated, I use layer masks to remove the orange saturation and contrast off of my face.
I hope these quick tips help in any way, and please let me know in the comments below if these tips help you! I will continue to post my findings and discoveries as a photographer if only they are of service to you! 🙂


hey lovely
I'm Helena
Free-spirit, author, astrocartographer and all around creative in love with documenting the simple joys of life. I am passionate about noticing light and truth around me and reflecting it back to others.
GET TO KNOW ME


browse around the podcast
for what will serve you best
listen to the podcast
™
Listen Here
Listen Here
popular
Intuitive living
Listen to your inner voice and follow it. Inspiration to trust yourself and your gut.

joy
Looking for some inspiration to live free and true to your heart? These posts will uplift and encourage you!
astrocartography
Free tips and resources for how to read your astrocartography map of the world!
it's personal
Helena shares her heart, experiences and what she's learned through trial and error!
categories
From Me To You
Get my (Travel) Postcards.
Join my free email newsletter to receive encouragement, astrocartography tips and inspiration from my travels on the road.
Join here
Good vibes only. No spam.


